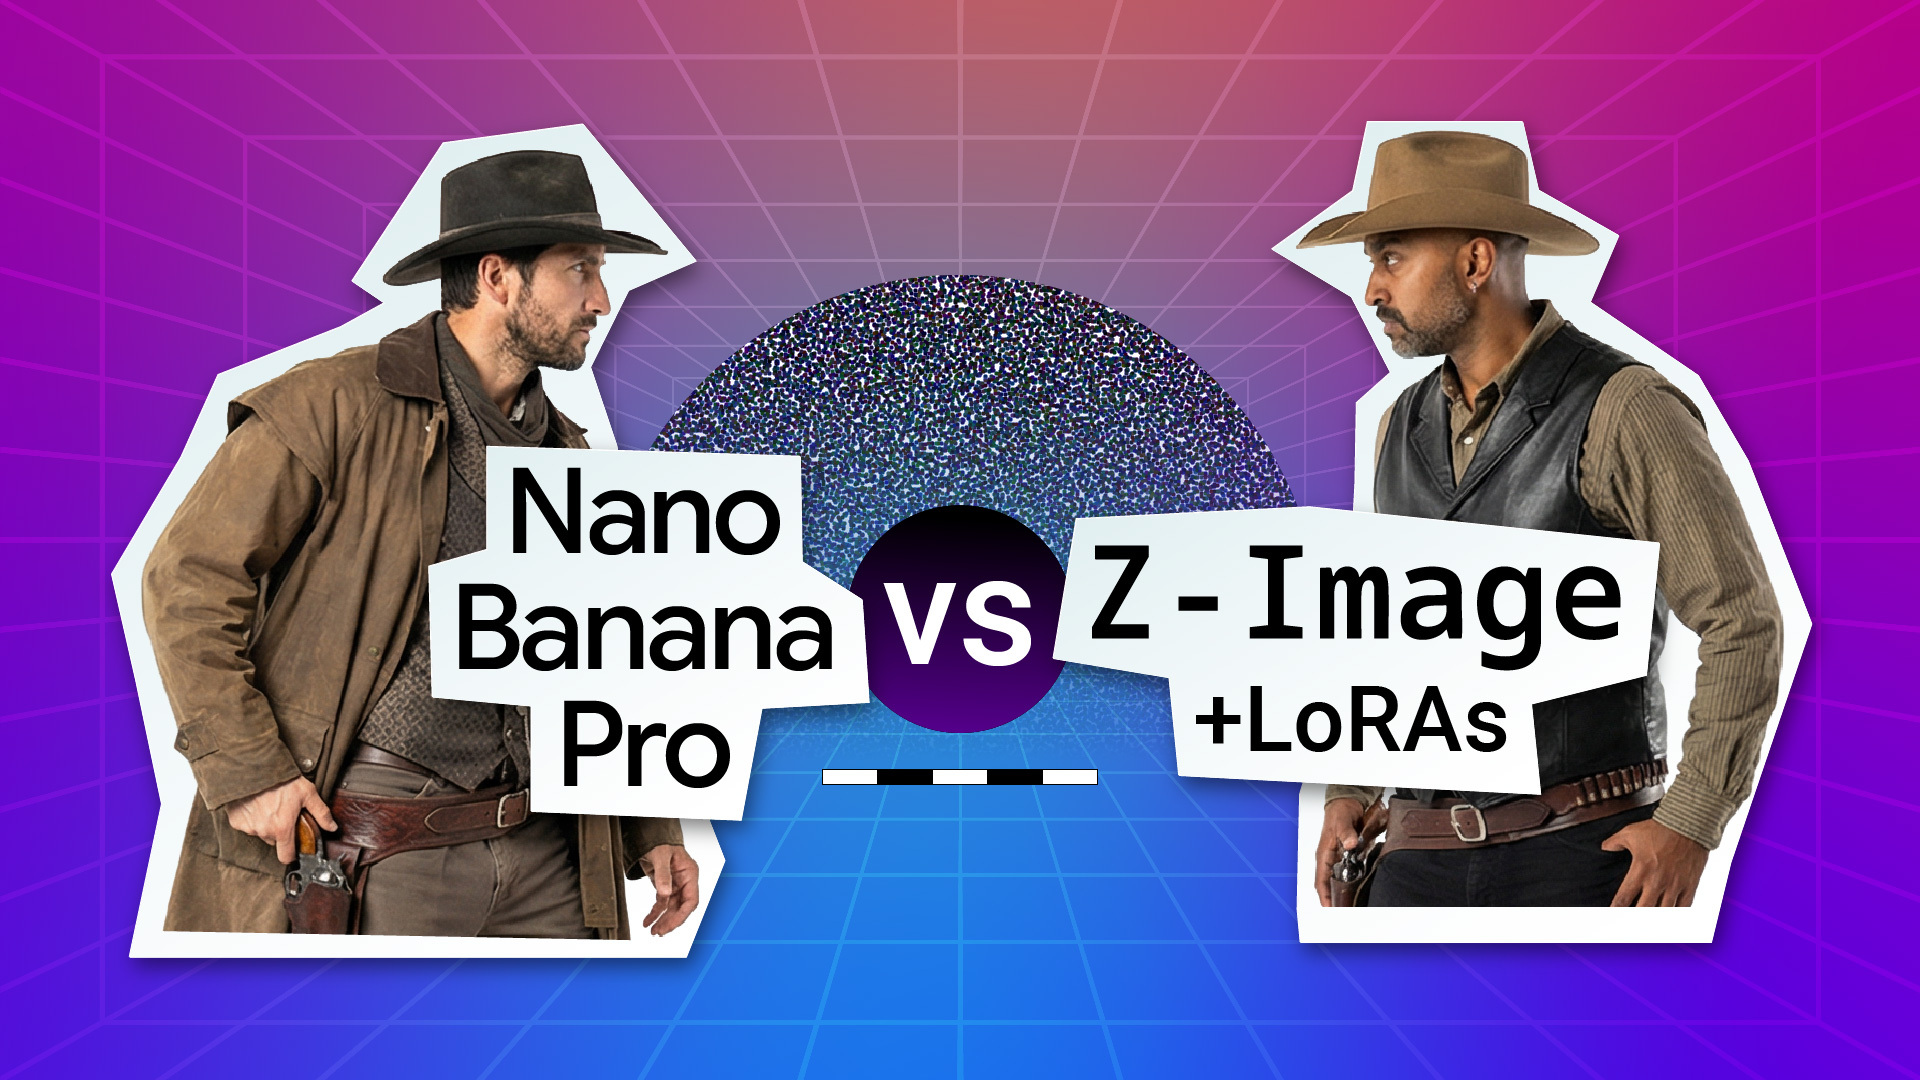
In this week’s episode of Denoised, Joey and Addy stage a practical showdown between two ways to capture a film's cinematography in pre-production: training a LoRA on Z-Image versus feeding reference images into Nano Banana Pro (via Freepik Spaces). The target style is the VistaVision look from One Battle After Another, and the hosts test three distinct looks from the film: a magenta-tinged nighttime raid, neutral Sacramento exteriors, and the desert highway sequences.
What the hosts set out to reproduce
Joey and Addy chose three stylistic buckets from the film:
Nighttime magenta-saturated border-raid lighting with heavy halation.
Neutral downtown Sacramento exteriors with office-building compositions.
Desert highway and rolling-hills sequences with dry vegetation and grit.
The plan: try to generate new frames that feel like they belong to those scenes—useful for previs, mood boards, and pitching.

Training a LoRA on Z-Image (Addy’s workflow)
Addy goes the LoRA route using the open-source Z-Image model. Key points from the process:
Source imagery: frames were pulled from ShotDeck to capture the VistaVision fingerprint—color, halation, composition, and rugged locations. They emphasized this was for educational use, and recommended using one’s own test shoots or location photos in actual productions.
Caption pairing: images were paired with text captions (one text file per image). Auto-caption tools like Gemini or Claude can bootstrap captions, but manual edits improve fidelity for a bespoke cinematography style.
Training platform and settings: Addy used a quick LoRA trainer (the session reported training in roughly 5–6 minutes). He kept learning rates and mode at default balanced settings to target style rather than single objects.
Output artifacts: the training produced an 82 MB LoRA tensor file and a small config file, which can be dropped into other Z-Image workflows or ComfyUI later.

Speed and iteration matter: a LoRA plus Z-Image produced results in a handful of seconds per image, which is ideal during rapid idea generation. The LoRA style influence is controlled via a weight or scale parameter. Push it too hard and the model breaks into odd artifacts—LoRAs are powerful but not a silver bullet.
Nano Banana Pro with reference images in Freepik Spaces (Joey’s workflow)

Joey tests the reference-image workflow with Nano Banana Pro inside Freepik Spaces. His approach focuses on fewer, carefully chosen references and modular prompt design:
Compact reference set: instead of dozens of frames, Joey uses four representative images per look—locations and occasional people—to establish lighting, color and composition cues.
System prompt via Claude: he generates a reusable system prompt that describes how Nano Banana should apply the style of the references without reproducing copyrighted frames. This prompt is appended to specific shot prompts, creating a modular pipeline for different scenes.
Freepik Spaces conveniences: multiple text boxes and draggable nodes let the user keep the style prompt separate from shot-specific content. This makes iteration and swapping shots easier than rewriting a single long prompt each time.
The outputs were convincing across the three looks. Nano Banana Pro nailed halation, neon/text clarity, and structural elements like border walls and signage—areas where Z-Image without a LoRA struggled.

Head-to-head observations
The hosts ran identical shot prompts across both setups to compare results. The main findings:
Style transfer vs structural fidelity: LoRAs excelled at pulling the film’s color palette, sodium lighting tones and halation into new scenes. The LoRA-guided Z-Image output was more cinematic for color and mood. Nano Banana, using reference images, was stronger at accurate structural content, text legibility, and sharpness—useful for things like neon signs, architecture, and readable street-level details.
Speed: Z-Image with LoRA returned images in about 3–4 seconds, which matters when producing dozens of variants during a brainstorm. Nano Banana was slower—roughly tens of seconds per render—but the quality tradeoff for certain assets often justified the wait.
Prompt flexibility: Freepik Spaces plus Nano Banana made mixing actor references, location photos, and style images easy. That meant you could tag a specific actor/photo and ask the model to place that actor into a new scene with the target style applied.
LoRA scope matters: trying to cram three very different looks into one LoRA reduced consistency. The hosts suggested that a better LoRA strategy is to train one LoRA per scene/look rather than a single catchall LoRA.

Practical recommendations for filmmakers
Based on the comparison, here are actionable guidelines for using these tools in pre-production:
Use reference-image workflows when you need accurate assets and real-world detail. If you’re showing a production designer or location scout how signage, architecture or an actor should look in a new scene, reference-image driven models like Nano Banana Pro are more reliable.
Train LoRAs when you want consistent stylistic transfer. For locking in a color palette, halation, or film-stock look across many new images, a dedicated LoRA per look will deliver repeatable mood quickly.
Adopt a hybrid pipeline. Combine both: use LoRAs for global style and reference-image models for asset fidelity. In environments like ComfyUI you can chain models and LoRAs to get the best of both worlds.
Collect your own images for production use. Instead of sourcing copyrighted film frames, shoot a few test sequences or location photos and color grade them to your target look. Those images make far better, legally safer training material for LoRAs.
Mind the weight. Don’t crank LoRA scales to maximum—heavy weights often introduce strange artifacts. Use test iterations and small incremental changes to the influence parameter.
Key takeaways
The experiment surfaces a pragmatic truth for creative teams: neither approach is strictly superior. Reference-driven models like Nano Banana Pro currently outperform off-the-shelf models at replicating structural, readable elements and real-world assets. LoRAs still win at applying a consistent cinematic look quickly, especially at high iteration speed with Z-Image.
For most production needs the recommended path is hybrid: gather a small set of representative photos or test footage, train targeted LoRAs per look when you need consistent style, and use reference-image models when you need precise objects, text or architectural fidelity. Split the workload according to the creative problem you’re solving—mood vs practical assets—and let the tools complement one another.
Final Note
This comparison isn’t an endpoint; it’s a working playbook. Filmmaking workflows will continue to evolve as models improve and UI tools get faster. For now, the smart move is to treat LoRAs and reference-image models as complementary tools in the previs and look-development toolkit.
Try both, pick the right tool for the question you’re trying to answer, and prototype before you shoot.